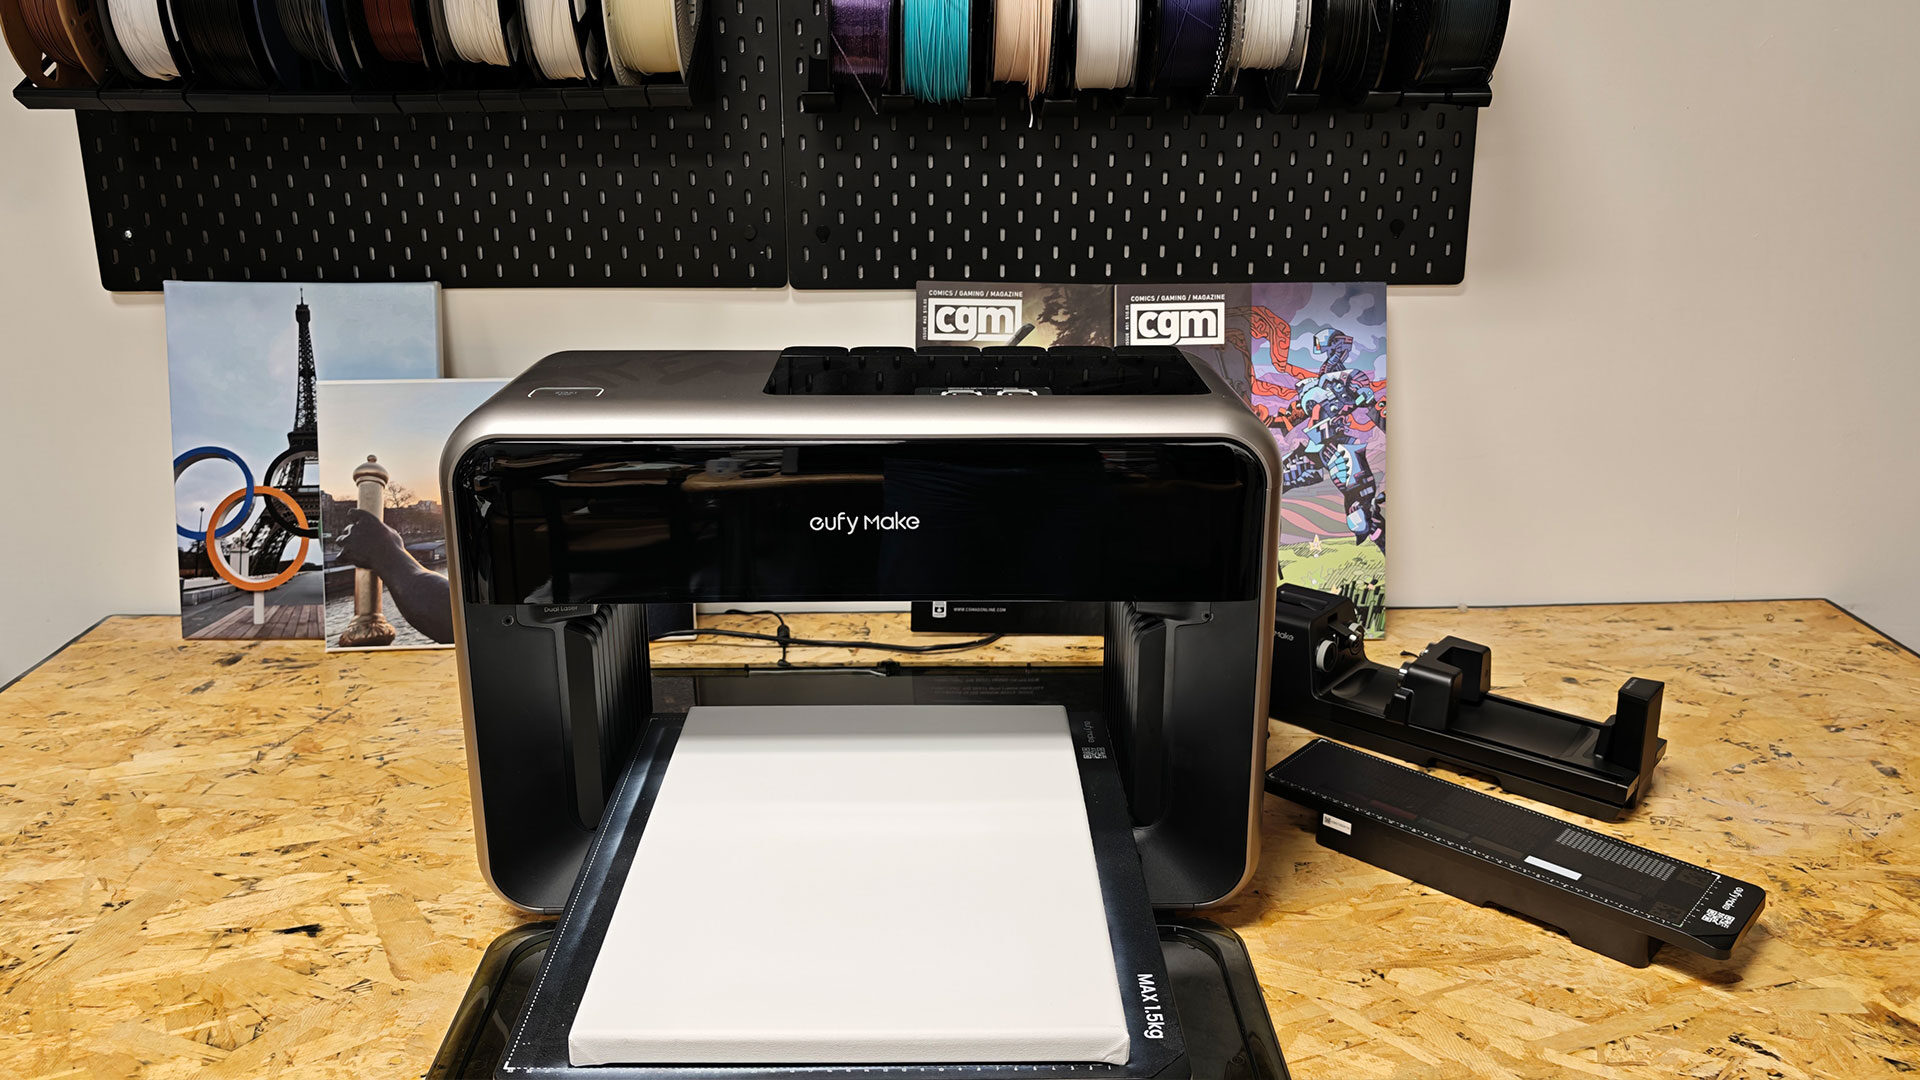


UV printing has not historically been an option for casual makers. There have been machines that allow it, but they have not been affordable or, frankly, easy to use. eufyMake looks to change that with its latest printer, the E1 UV Printer. Coming from Anker’s eufyMake brand, this desktop-sized machine brings all the features you could want from a UV printer, including the ability to print on almost anything, giving you full-colour, textured prints that look stunning. That is a tall order for a machine at this price point, but somehow it surprised me.
From the moment I unboxed it, the eufyMake E1 UV impressed me. It is packed incredibly well in a striking box, and even as you start putting it together and getting everything ready, the machine looks incredibly premium and, above all, feels very well made.
It has guides in place to help you get started, including how to install the ink, the cleaning solution, and the different beds, with the software walking you through the rest once you turn on the eufyMake E1 UV. The machine is about the size of a larger inkjet printer, at around 610 x 480 x 235 mm (approximately 24 x 19 x 9.3 inches), and is hefty, weighing in at 15 to 16 kg, so do not expect to move this thing around without some help.

This is one area where I have to commend eufyMake: the initial setup for the E1 UV was incredibly simple. I opted to use the mobile app to get things going, and it walked me through each step, helping make sure everything was level and ready to go, and even making sure I understood how to get my first print going. It was well thought out and surprisingly easy.
I have used many machines related to printing, and most do not have you up and running within 30 minutes. It delivered on the promise of a machine that makes it possible for anyone to jump into the hobby, at least from a setup point of view.
“From the moment I unboxed it, the eufyMake E1 UV impressed me.”
The big selling point in a UV printer like the eufyMake E1 is the ability to print on almost any surface. For testing, eufyMake sent a wide range of accessories and materials to work with, and while doing the review, I tested on a range of materials beyond that, including 3D prints, canvas, ceramic, and even metal, although more on that in a bit. This is a machine that is built to complement a maker’s potential, and it is impressive.
In the box, you can find the regular small bed for smaller jobs with a print size of 335mm X 90mm, along with the flatbed that offers 330mm X 420mm (around 13 inches X 16.5 inches). It also offers accessories you can buy separately that allow for cylindrical items and Roll-to-Film. Giving you a wide range of options to take advantage of the technology, depending on your needs. The eufyMake E1 boasts a print resolution of 1,200 x 2,400 DPI and runs Cyan, Magenta, Yellow, Black (CMYK), plus dedicated White and Varnish channels for the inks, giving you a wide range of colours to take advantage of when using the machine for printing.

I should note here that while the eufyMake E1 is incredibly versatile, it suffers from the same issues many ink cartridge-based machines suffer from, and will go through quite a bit of ink as you pump out projects. The eufyMake Studio will help point out the use of ink for any job, but once you start creating with the machine, you will find your inks will start to run low quickly, especially the white ink, which is used as the base for many different types of work.
A full set of inks will set you back around $299 US, with a single cartridge costing around $42.99 US, meaning that, like any inkjet-style printer, you will be buying cartridges often once you start diving into what is possible with the machine, and trust me, once you actually dive into the potential, you will start burning ink. I will touch on it in more detail in a bit, but despite the cost, the eufyMake E1 produces incredibly striking results, with most of the tests we ran through during the review process turning out incredibly well, and at times better than I expected.
It will take some time to get the settings dialled in, but once you do, you will start looking for ways to push this machine in all kinds of directions. I started testing the eufyMake E1 in combination with 3D printing, adding much-needed detail and style to flat prints that came right off the Bambu Lab H2S, and even on prints that were not as perfect as I would like, I managed to deliver striking results.

Since the machine prints where you tell it to, you need to use the software to nail down how everything prints and where. I can tell you this does take some getting used to, especially on canvas. You should expect to have some spillover as you learn how the machine works and how to get the best results, but honestly, it does not take away from the final product. As long as you do not mind the print bed getting a little messy, experimentation is key when working with this machine.
“The big selling point in a UV printer like the eufyMake E1 is the ability to print on almost any surface.”
The eufyMake E1 works by laying down a layer of UV-curable ink, and a built-in UV LED array instantly cures each pass as the printer works on a given job. Think of it like an inkjet with an extra step, and the potential to cause issues if you look directly at the LED. The white ink acts as a base for the overall job, although you can adjust how this works once you understand the software and printer better, so you will be going through the white ink most of all. The final step is the glossy ink that helps the overall image of any job pop, giving the finished product a distinct and vibrant look.
What makes this process so much different than a standard inkjet is how durable the ink is once it has cured, and how well it bonds to the surfaces you print on. Once you print, and the process is finished, the design or image is permanently on the material. This means it can be used for art, tumblers you use often and even coasters, without you stressing that it will come off during use, which is the perfect situation for makers who want things to last.

The process also means you can go beyond simple 2D prints on various materials and can produce 3D tactile prints, where you can feel the various levels of ink as it goes on. The more built up you do, the more ink it will consume, but provided you can imagine it and can design something that takes advantage of the tech, the machine can produce it. This means you can create everything from greyscale height maps to embossed-to-relief effects on the printed surface. It is oddly versatile, and even after testing things for a few weeks now, I have only started to scratch the surface of what is possible.
The software experience is serviceable on both the mobile app and eufyMake Studio, but if you really want to push the eufyMake E1 printer to its full potential, I would recommend diving into the full Windows application. Both offer most of the same features, but when precision is in question, a mouse is infinitely more accurate than a finger, even with snap guides to help the process.
You start your print by having the software take a picture of the area, where it will detect the height of the print surface, while also giving you a picture of what your print bed looks like, so you can lay your design down and align everything properly. The machine does take a bit of time when you first start things up to run the inks and get the machine primed and ready to print, but once everything is in place, the process is relatively easy.


You lay your design down how you want it, set the surface type, adjust some settings for quality, and you are off to the races. A larger print on standard settings will take around 30 to 40 minutes, while on high quality, it will push the time to around an hour or more. This can be pushed further if you want to add depth and more complex prints, but it is a good baseline to plan out your projects.
The same process is used when you want to use other accessories, such as the rotary printing attachment. You tell the software to take a picture, and then lay out your design as you want it. The software makes the process of placing the design relatively easy, even on a mug or other object, and you will very quickly get the hang of arranging designs in a way that delivers the best possible results.
Even on the mobile app, eufyMake has made the process incredibly intuitive, and I was surprised at how quickly I went from having an idea to seeing it print properly. The latest version at the time of writing will even detect contours on the print surface, taking much of the guesswork out of the overall process of getting the design ready to go.


This brings me to the results, and I have to say the eufyMake E1 delivers on the promise, with prints looking striking and more vibrant than I thought it would be able to manage. Each print I tried, save for some early test prints, looked fantastic. It adhered well to the various materials, and the overall quality was impressive.
The layered UV ink managed to deliver some incredibly detailed prints that captured the look of the original files well. I tested a range of photos and cover prints from CGMagazine, and they all came out well on a variety of materials, including canvas, wood and even metal. The UV ink proved durable, and the results looked good enough to hang on walls and show off without the fear of them looking amateur.
Okay, this all sounds pretty solid, so what is the catch? Well, to put it simply, the price. While the eufyMake E1 UV Printer is significantly cheaper and smaller than many of the UV printers already available on the market, it still is not what I would call cheap. The base bundle for the machine, which includes none of the accessories or extra goodies, will set you back, at the time of writing, around $2,299 US.

If you want a more complete bundle, you are looking at around $3,299 US, and that would include the roll-to-film attachment, UV DTF laminating machine, the various inks and cleaning cartridge, as well as the machine itself. Depending on your needs, you can see the investment in the eufyMake E1 UV Printer as quite a bit of an upfront cost.
If you have a use for the eufyMake E1 UV Printer, this is not unreasonable, with many UV printers costing well over $10,000 and taking up a full room in your house or office, so the investment makes sense. But if you just want something to do a few prints now and then, this may not be the machine for you. Despite being a cheaper alternative, it is still very much a machine built to deliver quality results, and it will set you back a pretty penny to do so.
This does not take into account the cost of inks and other supplies that you will go through once you start putting the eufyMake E1 UV Printer to work. For someone who has a side hustle or is looking at ways to print for a company, this makes sense. For the average person who just wants to print a few photos on canvas, there are much cheaper ways to do so that will not take up an entire table in your home office.

Despite the cost, I really think eufyMake has a winner with the E1. This is a machine that produces striking results, can print on almost anything, and does so quickly and reliably. It takes a technology that has been relatively out of reach for smaller creators and delivers it in an incredibly well-designed and professional package.
While it still has a relatively high barrier to entry, it manages to strike a balance between being professional enough and not costing the price of a small car. For creators and makers who want to push their designs to a new level, combine materials and push the software in new and fun ways, the eufyMake E1 is a fantastic machine and delivers on the promise. While it may not be for everyone, for those it is built for, it delivers solid, consistent results that are well worth experiencing.